1. Introduction to Razorpay Integration
Razorpay is a leading online payment gateway in India that provides a simple and seamless payment experience. Integrating Razorpay into your React application involves several steps, including creating a Razorpay order on the server, rendering the Razorpay payment modal on the client side, and handling the payment status updat
2. Setting Up the React Environment
Before integrating Razorpay, ensure you have a React environment set up. If you haven’t set up your React project yet, you can do so by running the following command:
npx create-react-app my-app
cd my-appNext, install the necessary dependencies:
npm install axios react-hot-toast react-redux prop-types crypto-js
These dependencies include:
- axios for making HTTP requests.
- react-hot-toast for showing toast notifications.
- react-redux for state management.
- prop-types for runtime type checking.
- crypto-js for cryptographic operations.
3. Creating Razorpay Order
To initiate the payment process, you first need to create a Razorpay order on the server. This is done using the
createRazorPayOrder function, which makes a POST request to your server to create a new Razorpay order.const createRazorPayOrder = async () => {
try {
const token = user.token;
const response = await axios.post(
`${baseUrl}/public/create-payment`,
{
amount: 99,
currency: "INR",
keyId: process.env.REACT_APP_RAZORPAY_KEY_ID,
KeySecret: process.env.REACT_APP_RAZORPAY_KEY_SECRET,
user_id: user._id,
},
{
headers: {
Authorization: `Bearer ${token}`,
},
}
);
if (response && response.order_id) {
setOrderDetails({
orderId: response.order_id,
currency: response.currency,
amount: response.amount,
});
}
setOrderDetails(response.data);
} catch (error) {
console.error("Error creating RazorPay order:", error);
toast.error("Failed to create RazorPay order. Please try again later.");
}
};
Key Points:
- Authorization: The request includes an authorization header with the user’s token to ensure secure communication.
- Order Creation: The function sends a POST request to the
/public/create-paymentendpoint with order details. - Error Handling: If the request fails, an error message is logged and a toast notification is displayed to the user.
4. Rendering the Razorpay Payment Modal
The
RenderRazorpay component is responsible for loading the Razorpay script, configuring the payment modal options, and opening the modal for the user to complete the payment.const loadScript = (src) => new Promise((resolve) => {
const script = document.createElement('script');
script.src = src;
script.onload = () => resolve(true);
script.onerror = () => {
console.error('Failed to load Razorpay script');
toast.error('Failed to load Razorpay script');
resolve(false);
};
document.body.appendChild(script);
});
const RenderRazorpay = ({ orderId, keyId, keySecret, currency, amount, userId, onClose }) => {
const baseUrl = process.env.REACT_APP_BASE_URL;
const rzpRef = useRef(null);
const dispatch = useDispatch();
useEffect(() => {
const initializeRazorpay = async () => {
const res = await loadScript('https://checkout.razorpay.com/v1/checkout.js');
if (!res) {
console.log('Razorpay SDK failed to load. Are you online?');
return;
}
const options = {
key: keyId,
amount: amount * 100,
currency,
name: ‘Multigenesys Software Pvt Ltd',
order_id: orderId,
image: logo,
handler: async (response) => {
console.log('Payment succeeded:', response);
const succeeded = crypto
.HmacSHA256(`${orderId}|${response.razorpay_payment_id}`, keySecret)
.toString() === response.razorpay_signature;
await handlePayment(succeeded ? 'succeeded' : 'failed', {
orderId,
paymentId: response.razorpay_payment_id,
signature: response.razorpay_signature,
userId,
});
onClose();
},
modal: {
confirm_close: true,
ondismiss: (reason) => {
handleModalDismiss(reason, { orderId, userId });
onClose();
},
},
retry: {
enabled: false,
},
timeout: 900,
};
rzpRef.current = new window.Razorpay(options);
rzpRef.current.open();
};
initializeRazorpay();
return () => {
if (rzpRef.current) {
rzpRef.current.close();
}
};
}, [orderId, keyId, keySecret, currency, amount, userId, onClose]);
const handleModalDismiss = (reason, details) => {
if (reason === undefined) {
console.log('Payment cancelled');
handlePayment('Cancelled', details);
toast('Payment Cancelled!', {
icon: ':x:',
autoClose: 5000,
});
} else if (reason === 'timeout') {
console.log('Payment timed out');
handlePayment('timedout', details);
toast.error('Payment timed out!', {
icon: ':hourglass_flowing_sand:',
autoClose: 5000,
});
} else {
console.log('Payment failed');
handlePayment('failed', details);
toast.error('Payment transaction failed');
}
};
return null;
};
Key Points:
- Loading Razorpay Script: The
loadScriptfunction dynamically loads the Razorpay script from their CDN. - Razorpay Options: The
optionsobject configures the Razorpay modal, including the key, amount, currency, order ID, and handler functions. - Payment Handler: The
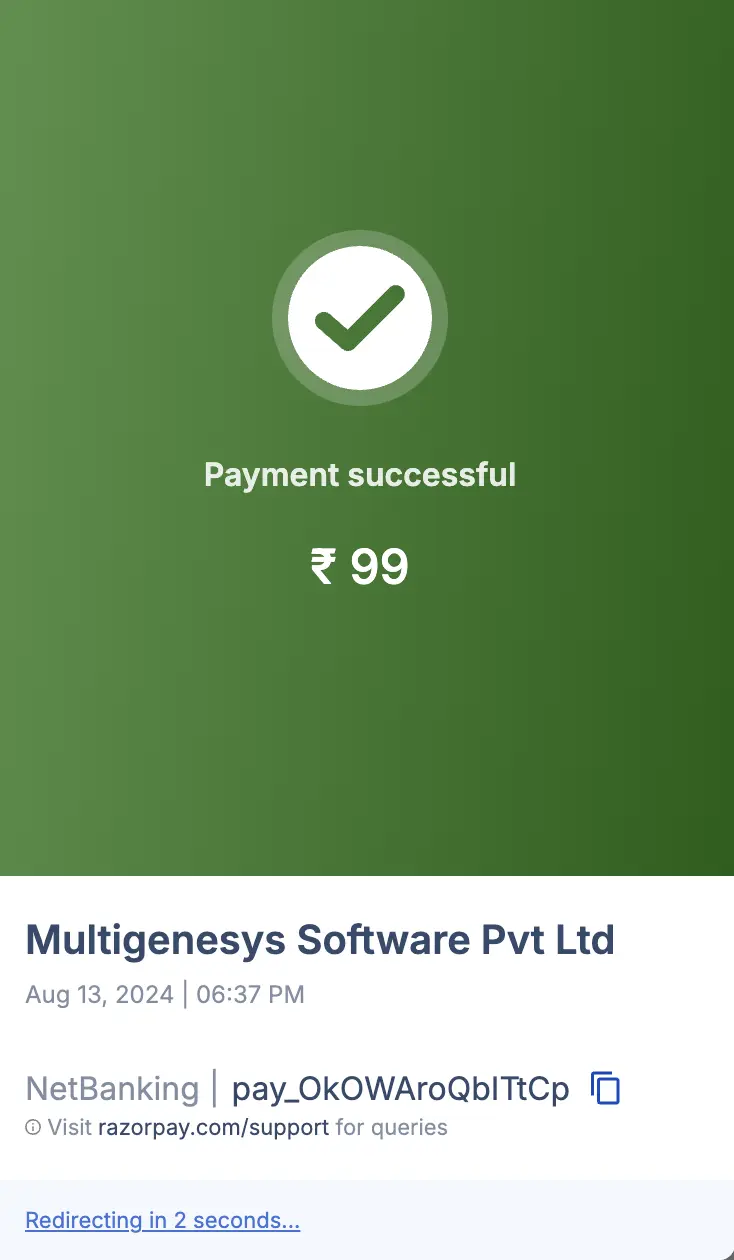
handlerfunction is called after a successful payment, validating the payment signature. - Modal Dismiss Handler: The
ondismissfunction handles cases where the user closes the modal without completing the payment.
5. Handling Payment Status Updates
After a payment attempt, the status needs to be updated on the server. This is done by sending a PUT request to update the payment status based on the response received from Razorpay.
const handlePayment = async (status, details) => {
try {
console.log('Sending payment status update:', status, details);
const postData = {
razorpay_order_id: details.orderId,
razorpay_payment_id: details.paymentId,
user_id: details.userId,
razorpay_signature: details.signature,
};
const response = await axios.put(
`${baseUrl}/public/update-payment-status`,
postData
);
console.log('Payment status updated:', response.data);
localStorage.setItem('user', JSON.stringify(response.data.user));
dispatch(setUser(response.data));
window.location.reload();
toast.success('Payment Successful');
} catch (error) {
console.error('Error updating payment status:', error);
}
};
Key Points:
- Status Update: The function updates the payment status based on whether the payment succeeded or failed.
- Server Communication: A PUT request is sent to the server with the payment details to update the order status.
- Local Storage Update: The user’s data is updated in the local storage upon successful payment.
6. Complete Code Example
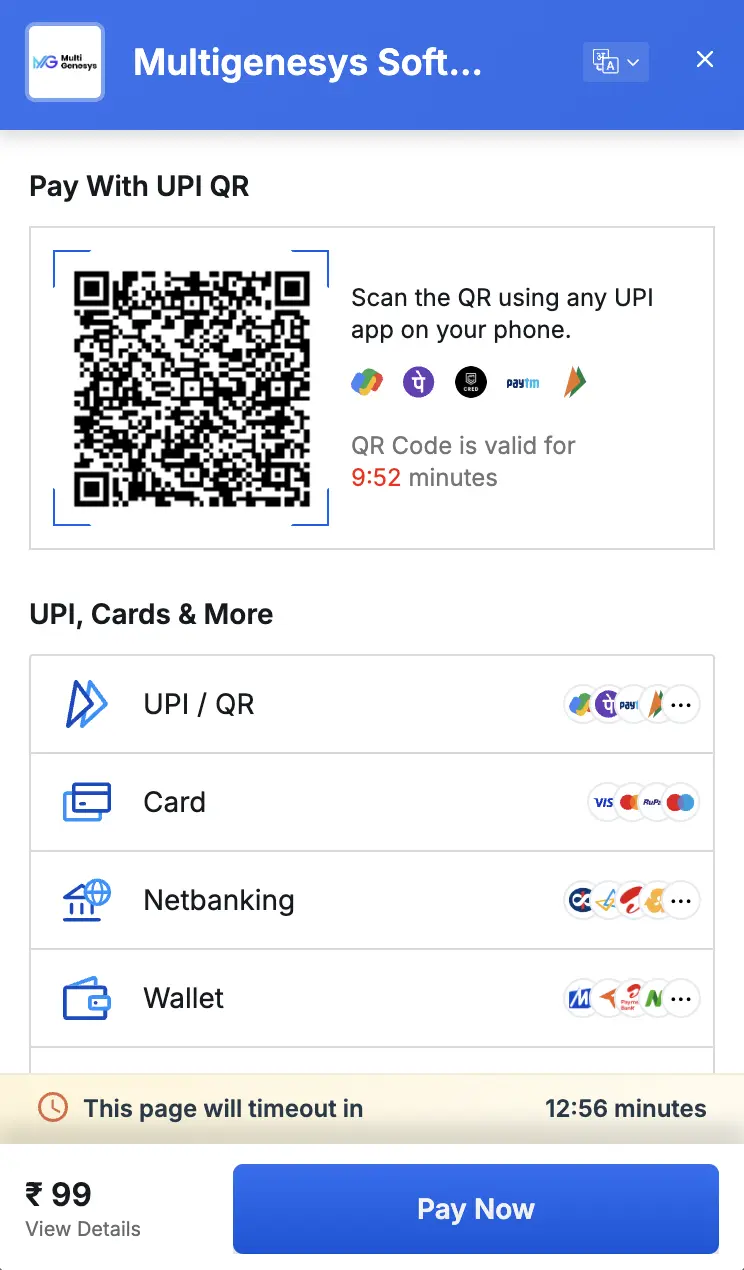
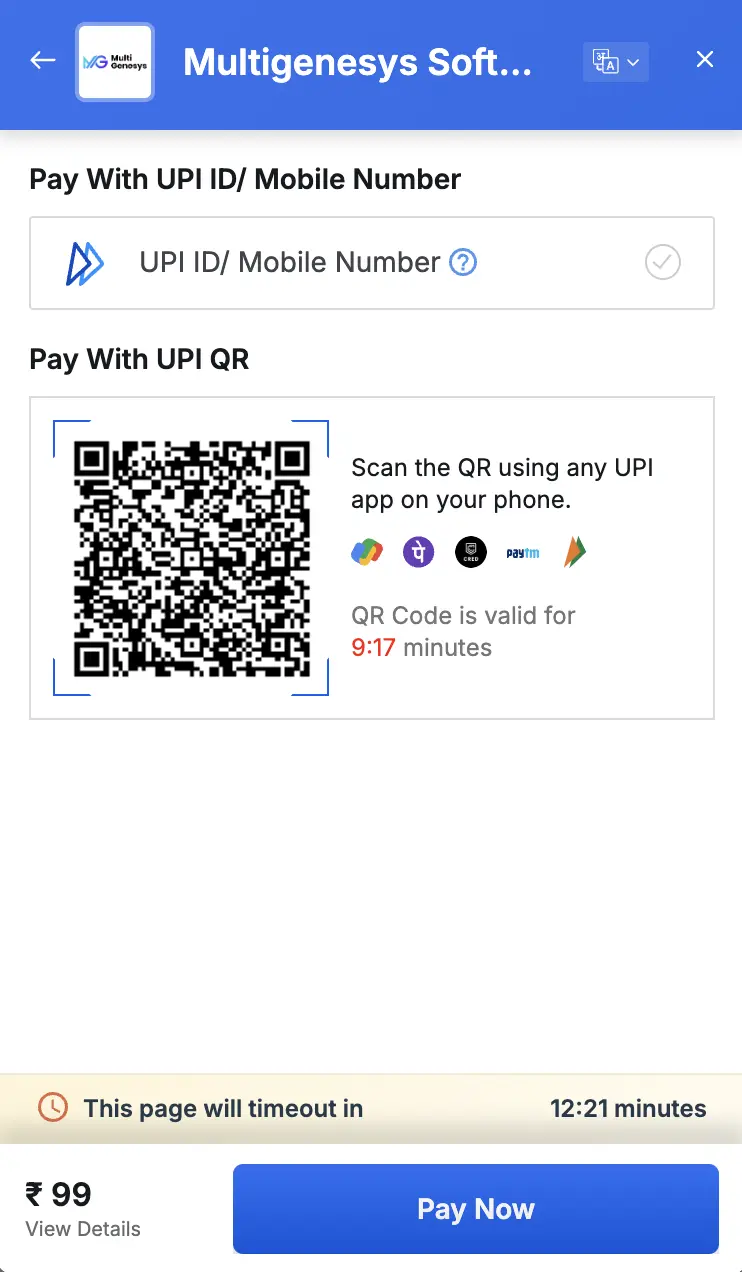
Here’s the complete example that combines the
createRazorPayOrder function, the button to trigger the payment modal, and the RenderRazorpay component.import React, { useEffect, useRef } from 'react';
import PropTypes from 'prop-types';
import crypto from 'crypto-js';
import axios from 'axios';
import logo from '../Assets/img/logoBg.png';
import toast from 'react-hot-toast';
import { setUser } from '../../slice/authSlice';
import { useDispatch } from 'react-redux';
const loadScript = (src) => new Promise((resolve) => {
 const script = document.createElement('script');
 script.src = src;
 script.onload = () => resolve(true);
 script.onerror = () => {
  console.error('Failed to load Razorpay script');
  toast.error('Failed to load Razorpay script');
  resolve(false);
 };
 document.body.appendChild(script);
});
const RenderRazorpay = ({ orderId, keyId, keySecret, currency, amount, userId, onClose }) => {
 const baseUrl = process.env.REACT_APP_BASE_URL;
 const rzpRef = useRef(null);
 const dispatch = useDispatch();
 useEffect(() => {
  const initializeRazorpay = async () => {
   const res = await loadScript('https://checkout.razorpay.com/v1/checkout.js');
   if (!res) {
    console.log('Razorpay SDK failed to load. Are you online?');
    return;
   }
   const options = {
    key: keyId,
    amount: amount * 100,
    currency,
    name: ‘Multigenesys Software Pvt Ltd',
    order_id: orderId,
    image: logo,
    handler: async (response) => {
     console.log('Payment succeeded:', response);
     const succeeded = crypto
      .HmacSHA256(`${orderId}|${response.razorpay_payment_id}`, keySecret)
      .toString() === response.razorpay_signature;
     await handlePayment(succeeded ? 'succeeded' : 'failed', {
      orderId,
      paymentId: response.razorpay_payment_id,
      signature: response.razorpay_signature,
      userId,
     });
     onClose();
    },
    modal: {
     confirm_close: true,
     ondismiss: (reason) => {
      handleModalDismiss(reason, { orderId, userId });
      onClose();
     },
    },
    retry: {
     enabled: false,
    },
    timeout: 900,
   };
   rzpRef.current = new window.Razorpay(options);
   rzpRef.current.open();
  };
  initializeRazorpay();
  return () => {
   if (rzpRef.current) {
    rzpRef.current.close();
   }
  };
 }, [orderId, keyId, keySecret, currency, amount, userId, onClose]);
 const handleModalDismiss = (reason, details) => {
  if (reason === undefined) {
   console.log('Payment cancelled');
   handlePayment('Cancelled', details);
   toast('Payment Cancelled!', {
    icon: ':x:',
    autoClose: 5000,
   });
  } else if (reason === 'timeout') {
   console.log('Payment timed out');
   handlePayment('timedout', details);
   toast.error('Payment timed out!', {
    icon: ':hourglass_flowing_sand:',
    autoClose: 5000,
   });
  } else {
   console.log('Payment failed');
   handlePayment('failed', details);
   toast.error('Payment transaction failed');
  }
 };
 return null;
};
const handlePayment = async (status, details) => {
 try {
  console.log('Sending payment status update:', status, details);
  const postData = {
   razorpay_order_id: details.orderId,
   razorpay_payment_id: details.paymentId,
   user_id: details.userId,
   razorpay_signature: details.signature,
  };
  const response = await axios.put(
   `${baseUrl}/public/update-payment-status`,
   postData
  );
  console.log('Payment status updated:', response.data);
  localStorage.setItem('user', JSON.stringify(response.data.user));
  dispatch(setUser(response.data));
  window.location.reload();
  toast.success('Payment Successful');
 } catch (error) {
  console.error('Error updating payment status:', error);
 }
};
const RazorPayButton = ({ user }) => {
const [showRazorpay, setShowRazorpay] = useState(false);
const [orderDetails, setOrderDetails] = useState({
orderId: '',
amount: '',
currency: '',
});
const baseUrl = process.env.REACT_APP_BASE_URL;
const createRazorPayOrder = async () => {
try {
const token = user.token;
const response = await axios.post(
`${baseUrl}/public/create-payment`,
{
amount: 99,
currency: 'INR',
keyId: process.env.REACT_APP_RAZORPAY_KEY_ID,
KeySecret: process.env.REACT_APP_RAZORPAY_KEY_SECRET,
user_id: user._id,
},
{
headers: {
Authorization: `Bearer ${token}`,
},
}
);
if (response && response.order_id) {
setOrderDetails({
orderId: response.order_id,
currency: response.currency,
amount: response.amount,
});
}
setOrderDetails(response.data);
setShowRazorpay(true);
} catch (error) {
console.error('Error creating RazorPay order:', error);
toast.error('Failed to create RazorPay order. Please try again later.');
}
};
return (
<>
{showRazorpay && (
setShowRazorpay(false)}
/>
)}
);
};
RazorPayButton.propTypes = {
user: PropTypes.shape({
_id: PropTypes.string.isRequired,
token: PropTypes.string.isRequired,
}).isRequired,
};

7. Conclusion
By following the steps outlined above, you should now have a fully functional Razorpay integration in your React application. This integration includes creating a Razorpay order, rendering the payment modal, and handling payment status updates. Remember to handle errors gracefully and provide clear feedback to users during the payment process.
This guide should serve as a comprehensive reference for integrating Razorpay into your React projects. For further customization and advanced features.

